利用nanoscope模块可以快速地将AFM成像原始数据转换为便于后续自己写代码分析的数据类型。
安装 nanoscope 模块可以使用 pip install nanoscope 命令即可。
然后这个模块附带了示例数据和代码,可以到该模块的安装目录中找到。
{anaconda3}\envs{afm}\Lib\site-packages\nanoscope
{anaconda3} 是 anaconda3 的安装目录, {afm} 是我创建的专门用于AFM成像数据分析的python虚拟环境
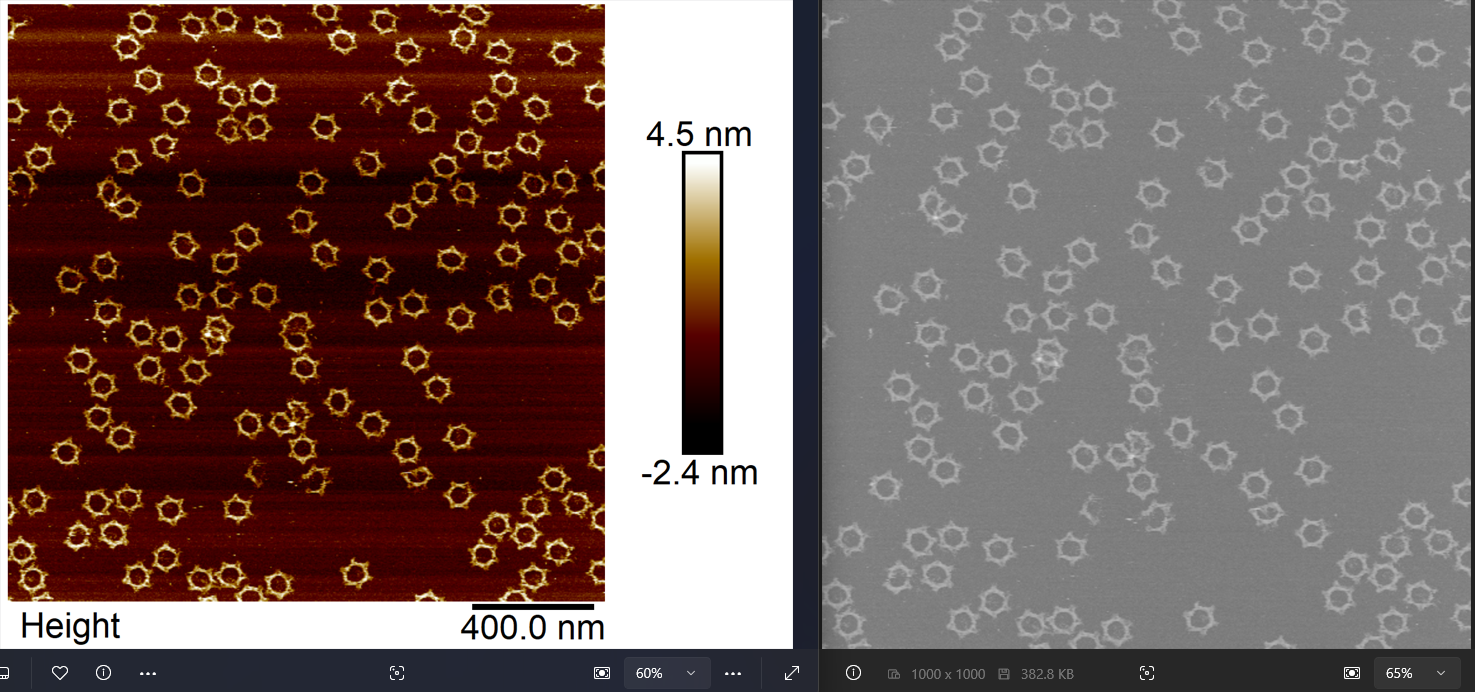
实际上这个部分内容要完成对AFM成像数据的预处理并导出为8-bit灰度图,具体效果如上。
获取高度数据的基础函数我已经封装如下:
import matplotlib.pyplot as pltimport numpy as npfrom PIL import Image
def getHeightData(fp): from nanoscope import files from nanoscope.constants import METRIC data = {} with files.ImageFile(fp) as f: height = f[0] #默认AFM成像第一个通道就是height image, ax_properties = height.create_image(METRIC) assert ax_properties['title']=='Height' data['data'] = image data['aspect_ratio'] = height.aspect_ratio data['scan_size'] = height.scan_size data['scan_size_unit'] = height.scan_size_unit data['z_sens_units'] = height.z_sens_units return data这里面 .create_image 是 nanoscope 模块自带的方法把最原始的数值转换为了高度,高度的单位可以查看 z_sens_units,然后创建的 image,每一条 row 就是 AFM针尖扫描的 line,然后每条 line 上采样多少 number就对应了图像的 col。所以 scan_size 就对应着 x_range。然后根据 aspect_ratio(横纵比,一般为1) 可以计算 y_range。
由于实际采集样品数据的类型比较单一(一般是正方形,扫描区域通常是微米级别,高度是纳米级别,可统一单位到纳米),所以进一步简化这个函数,避免各种单位判断和比例转换。
def getHeightData(fp): from nanoscope import files from nanoscope.constants import METRIC data = {} with files.ImageFile(fp) as f: height = f[0] image, ax_properties = height.create_image(METRIC) assert ax_properties['title']=='Height' assert abs(height.aspect_ratio-1)<0.01 assert height.z_sens_units=='nm' assert height.scan_size_unit==r'µm' data['data'] = image[::-1] # y axis invert,保持和在 NanoscopeAnalysis中看到的效果一样 data['row'], data['col'] = image.shape data['pixelsize'] = height.scan_size*1000/data['row'] return data需要注意的是,此时得到的高度数据没有对齐基线,所以还需要进行 flatten 处理。这里提供了两种方法。一个是 median 中值对齐方法,适用于视野中样品颗粒较低的情况。一种是 polyfit 对齐方法,一般情况下都能获得不错的抚平效果。
def flat_median(arr): box = [] for line in arr: line_ = line - np.median(line) box.append(line_) box = np.array(box) return box
def flat_polyfit(arr, order=1): box = [] for line in arr: coeff = np.polyfit(range(len(line)), line, order) correction = np.array( [sum([pow(i, n) * c for n, c in enumerate(reversed(coeff))]) for i in range(len(line))]) line_ = line - correction box.append(line_) box = np.array(box) return box完成 AFM 高度数据的抚平之后,为了导出为图像,还需要一些工作,主要涉及高度数据到 8-bit 像素的映射,以及导出图像的 pixelsize有一个 rescale 的过程。具体函数代码如下:
def convert(hmap, z_range=[-10, 10]): data = hmap.copy() low, high = z_range data = (data - low)/(high - low) inds = np.where(data<0) data[inds] = 0 inds = np.where(data>1) data[inds] = 1 data = data*255 data = data.astype('uint8') return data
def resize(data, pixelsize=2): # resize image, 1 pixel = 2 nm image = data['convert_flat_data'] img = Image.fromarray(image) pixelsize0 = data["pixelsize"] width = data["col"] height = data["row"] w = int(width*pixelsize0/pixelsize) h = int(height*pixelsize0/pixelsize) img2 = img.resize((w,h)) data['export_image'] = img2 data["export_image_pixelsize"] = pixelsize return data注意在这个地方,我根据实际情况,将高度映射的区间定到了 -10 到 10 nm,然后导出图像的 pixelsize 设置为了 1 pixel = 2 nm。
基于上述函数,对于单个AFM成像的原始数据,其预处理和导出函数再集成封装一下,就变成这样:
def single(fp, flat='median', pixelsize=2, z_range=[-10, 10]): assert fp.endswith(".spm") # 目前仅对Bruker Multimode VIII的采集到的spm数据文件进行过测试 # 发现部分以 `.001`, `.002` 之类结尾的数据不能nanoscope模块不能正确解析 # 后续可尝试另外一个 nanoscope 的开源项目以获得更好的兼容性 # https://github.com/jmarini/nanoscope/ data = getHeightData(fp) if flat=='polyfit': data['flat_data'] = flat_polyfit(data['data']) else: data['flat_data'] = flat_median(data['data']) data['convert_flat_data'] = convert(data['flat_data'], z_range=z_range) data = resize(data, pixelsize=pixelsize) fp2 = fp+".png" data['export_image'].save(fp2) return data如果是要对比较多的数据文件进行批量处理,可以考虑使用 joblib 模块来并行:
from glob import globfrom joblib import Parallel, delayed
fps = glob("*.spm")# 获取所有 spm 文件列表flat_method='median'pixelsize=2z_range=[-10, 10]
res = Parallel(n_jobs=-1)\ (delayed(single)(fp, flat_method, pixelsize, z_range)\ for idx,fp in enumerate(fps))